We bought a new furnace and air conditioner! As a bit of background, our 1905 house has a working furnace, but the AC is from 1984 and has never worked during our residency.
“Finally!” was the reaction that family members gave us when we told them the news. Then we informed them it wasn’t for our house but instead for a tenant’s apartment. Haha, silly goose you should know us better than that. 
The units that we were replacing were original to the 1975 building.
 You can usually decode the age of a unit by its model number. This Friedrich furnace, # GDA080NDB, starts with GDA. G = 1970s, D = Year 4, and A = January. So the manufacture date for this particular furnace was January of 1974, or more simply put, it was 43 years old.

The outside AC condenser was also original equipment.

Why Not Repair?

About a week and a half ago I got a call from the tenant saying that the AC wasn’t putting out cold air. I ran through a quick troubleshooting list and found no easy fixes. The thermostat was set to “cool”, the air handler blower was working and pushing air through the ductwork, the outside condenser had power and the fan was spinning, and the compressor was running. It was almost certainly a refrigerant leak. I knew that the former tenant who had lived there for seven years had rarely or never used the AC. This was likely a long term issue that had not just sprung up since the last season.
I called out an HVAC professional to give me an opinion and prices. These older AC systems use a refrigerant called R22, a nice ozone destroying cocktail that is being phased out of production in favor of a more environmentally friendly R410A. R22 and R410A are not compatible. As such, R22 refrigerant prices have skyrocketed. It is simple supply and demand. There are still a lot of old R22 systems that have working compressors, capacitors, and coils. They just need a top off of refrigerant.
The HVAC technician gave me a quote of $100/pound of R22 refrigerant. I asked how many pounds would be needed and he said “A lot”. At a minimum, I would guess five pounds to charge the system. That’s at least $500 right off the bat, plus you have to factor in the labor and the cost of fixing any leaks in the refrigerant lines. That is assuming that the leaks are in the lines and not somewhere in the condenser or the coil, both things that are not serviceable.
Repairing the system would have cost around $1,000 and at the end of the day, you still have equipment from the 1970s. So what does it cost to replace?
Replace
Replacement costs are going to vary WIDELY depending on what equipment you select, but more so on who you select to do the work. While replacing a gas furnace for another gas furnace is probably in the realm for an experienced DIYer, AC systems are definitely something that you are going to want a licensed and experienced person to come do for you.
I got a few bids from smaller mom and pop shops and individuals who work for bigger shops but also do moonlight work. While big companies are convenient with their dedicated salesmen, 24/7 phone hours, and flashy new trucks, you are also paying a surcharge on every job for dedicated salesmen, 24/7 phone hours, and flashy new trucks. The smaller the company, the smaller the overhead.
In the end, I found an individual who moonlights on the weekends. He had all of the expertise, but none of the heavy overhead. For the equipment, I selected the no bells and whistles, simplest models of Goodman furnace, condenser, and coil. Goodman gets crapped on a lot and there is no shortage of hate for it on the internet. Personally, I believe that all of the different brands are within a few percentage of quality to one another. The biggest separator in how long something lasts is how well it is installed. For example, if I installed a top of the line Trane or Carrier model AC system, it probably would last a quarter of the time as the most basic Goodman installed by a professional.
Another common misconception that consumers may run into is believing that they must buy the most efficient furnace or AC unit to save money.

First off, we don’t pay the utilities for the apartments, so there isn’t much to be saved by spending more on a flashier unit. Secondly, assuming that we did pay for the utilities, the payback time of a more efficient unit might be longer than the actual lifespan of the unit. Thirdly, the more bells and whistles on a unit means more things that can break. Service calls and parts can quickly erase any money saved by the higher efficiency.
Finally, simply upgrading from any 1970s unit to a basic 2017 unit will likely be a HUGE increase in efficiency. If I had to guess, the original AC equipment when it was installed was probably around a 6 or 7 SEER unit. After decades of use, it had probably degraded to a 4-5 SEER efficiency. By contrast, the new ‘least efficient’ unit that we installed is a 13 SEER unit. Likewise, the original furnace was probably a 65% efficiency unit when it was installed. It too had probably degraded and was operating in the 50-60% range. The one we just installed was a ‘least efficient’ 80% model.
While the big equipment gets a lot of attention, the quality and longevity of a new install can be greatly affected by the refrigerant lines that connect up the inside and outside.

Known as a line set, these two copper pipes carry the R410a between the outside condenser and inside evaporator coil. I chose to replace the old lines for three reasons.
- They were undersized for the new equipment
- They might have leaks in them
- Residual R22 contaminants and oil might be lurking inside them that could poison the new system
Unlike the water supply pipes in your house that might also be copper, these refrigerant lines need to be brazed together. Brazing is a high temperature method of connecting copper pipe. In terms of heat, there is Soldering < Brazing < Welding. Brazed joints can withstand the 400 PSI of pressure that is put on refrigerant lines.
Here is a picture of the new evaporator coil hooked up to the new line set.

There is really nothing DIY about this except maybe the condensate drain in the lower left corner.
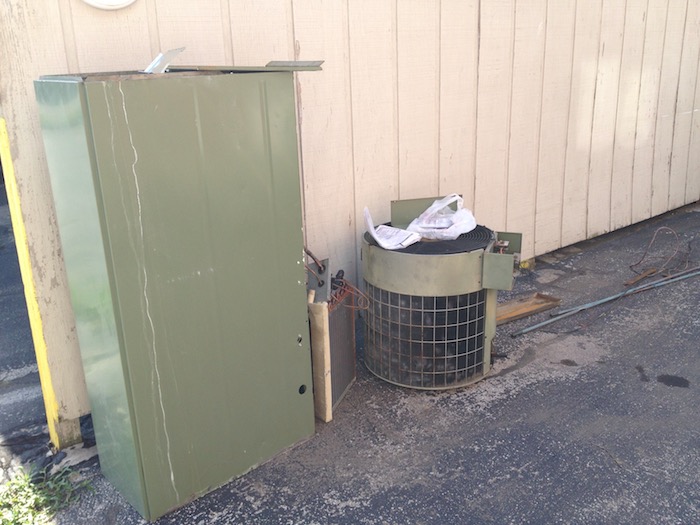
Here is the old equipment waiting for scrappers to come and recycle all of the metal.
The new furnace is quite a bit shorter than the old one, so the difference in height needs to be made up with some transition ductwork called a plenum.

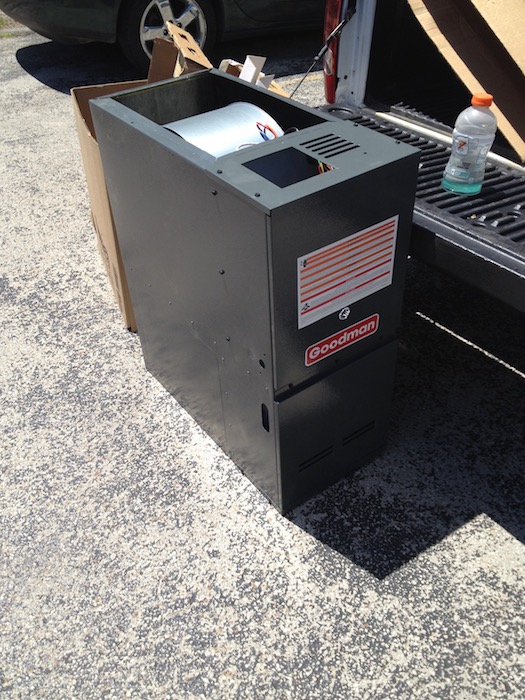
The inside of the furnace is dead simple.

The three black cylinders along the bottom are the burners. The two white electrical cables on the left that go to the cigarette looking thing is the hot surface ignitor (circled in purple). There is no pilot light to worry about, the hot surface ignitor just gets cherry red hot and lights the gas when it needs to. The other replaceable part is the flame sensor (circled in yellow) on the right side just above the burner.
Here is a picture of the AC system getting leak tested.

These outside condensers come pre-charged with refrigerant, but it is only enough to cover 12′ worth of copper lines. If your lines are longer than 12′ (hint, they probably are) you’ll have to top it off. Any HVAC pro worth their salt will fine tune the system anyway.
It took about 16 hours of work to replace all the components. The total cost, including labor, was about $3200 with the equipment being priced near or at cost. The nice thing about Goodman, is that you can actually see prices online. We saved $200 in labor by doing both the furnace and AC at the same time.
With any luck we’ll have no trouble out of this equipment for at least 10 years, hopefully 20. It is more environmentally friendly, reduces utility bills, and is quieter.
Now we have four more to do and you can guess which one will be done last. 


